Showing posts with label Recipe. Show all posts

Tuesday, 21 October 2014

Minestrone Soup

The last of the warm air is trickling away to be replaced by a brisk chill; grey clouds are gathering to shower trees whose leaves are stripped away by quickening gusts of wind:dressing the pavements in varying shades of gold.

Yep, it's definitely Autumn now which means soup is in order. This is my favourite soup, full of Italian flavours and delicious vegetables, that can be a meal in itself or served with warm, soft bread oozing melting butter.


This soup cooks quite quickly, but is fine to slow cook over a longer duration if you want to bring out the flavours more. It works well with loads of different vegetables so have fun trying out your favourites. For meat eaters, a couple of sausages can also be grilled, chopped and thrown in to the pan as well. For the pasta, there's lots of different ones to try. I used small shells in this one, but my favourite are tiny pasta stars as in the photo below.


Minestrone

Packed with veg, pasta and lots of Italian flavours, this hearty soup is perfect for cold evenings. Serve with garlic bread and a sprinkling of grated parmesan or cheddar.

Cake Crumbs & Ink Blots: Minestrone
Serves 4-6

Ingredients

  • Olive oil
  • 2 garlic cloves, crushed
  • 1 onion, chopped finely
  • 1 reduced salt vegetable stock cube made up with 1 litre boiling water
  • 500g passata
  • 3 cups of vegetables - peas, pepper, carrot, courgette or whatever you fancy!
  • 2 tablespoons parmesan
  • 1 tablespoon Italian seasoning/basil/oregano
  • 1/2 cup small soup pasta

Method

  1. Add oil, garlic and onion to large saucepan. Cover with lid and let soften for 5 minutes.
  2. Add stock, passata and vegetables, bring to the boil, then simmer for 10-15 minutes until vegetables are soft. It will seem quite watery at this stage but the pasta will thicken it.
  3. Add the parmesan, seasoning and pasta and continue to simmer until pasta is cooked through. Serve!

Friday, 28 December 2012

Cherry, Almond and Chocolate Trifle

You can never have too many indulgent treats this time of year. Last year I made a chocolate and orange trifle for Christmas Day dessert. For a family party this week I decided to give it a new twist, taking advantage of the Amaretto that is hanging round in my parent's kitchen. I adore this chocolate custard - some can be quite thin which means the trifle ends up a bit all over the place. This is rich and creamy and makes the dish something special.

This recipe is a mix of favourite dessert flavours all in one: the cherry, cream and chocolate combination of a Black Forest Gateau; the almond flavour topped off with cherry inspired by Bakewell tarts; all layered in the traditional trifle style. Perfect for an indulgent but reassuringly old fashioned dessert to be served at a family gathering.

I hope everyone has had a lovely Christmas!

Cherry, Almond and Chocolate Trifle

Layers of vanilla and almond sponge, topped with raspberries and cherries, a rich chocolate custard, and whipped cream, topped with cherries, almonds and grated chocolate.

smile
Serves 6-8

Ingredients

  • 1 large raspberry and vanilla Swiss roll
  • 4 tbsp Amaretto 
  • 200g raspberries
  • 200g cherries
  • 3-4 tbsp raspberry or cherry jam
  • For the custard:
    • 2 egg yolks
    • 2 tbsp caster sugar
    • 2 tbsp cornflour
    • 200ml milk
    • 200g dark chocolate, melted
    • 250g tub ricotta
  • 225ml double cream (or other cream suitable for whipping)
  • Flaked almonds, to decorate
  • Grated chocolate, to decorate

Method

  1. Cut the Swiss roll into chunky slices. Lay these in a large serving dish, filling in any gaps with small pieces of sponge.
  2. Sprinkle the Amaretto over the sponge to soak in.
  3. Wash and pat dry the raspberries. Layer these on top of the sponge slices. Wash and chop the cherries, reserving 10 whole ones for decoration. Add these to the raspberries.
  4. Spoon enough jam over the fruit so there is a thin coating over the sponge to keep it moist. 
  5. Mix the egg yolks, sugar and cornflour in a large bowl to make a paste.
  6. Heat the milk in a pan until it reaches just below boiling point. Pour it over the egg mixture and stir until thoroughly combined. Return to the pan and heat through, stirring continuously, until the mixture is thickened and smooth.
  7. Return the custard to the large bowl. Add the melted chocolate and the ricotta and stir until combined. Pour over the fruit, smooth with the back of a spoon and leave in the fridge for an hour, or until set. 
  8. Whisk the cream until slightly thickened. Spread over the custard layer, or pipe if wished. 
  9. Arrange the remaining cherries over the cream. Sprinkle with the flaked almonds and grated chocolate. Store in the fridge until ready to serve. 

Wednesday, 19 December 2012

Mince Pie Slices with Lemon Icing

While I may begin making Christmas plans and buying presents before December hits, the one thing I manage to save until the 1st is indulging in Christmassy treats. Then I can't help but dig into chocolates, fruit cake, and my favourite, mince pies. Living next door to a bakery this year has been both brilliant and dangerous for my taste for thick buttery pastry encasing rich fruity mincemeat and sprinkled with sugar. I have had some of the best mince pies, but probably a tad too often than I should. Though isn't that the definition of this time of year?


I first made these mince pie slices last year and they went down very well. I do admit to cheating with the pastry; while most of the time I try to ensure everything I make is from scratch I feel there are some things that are acceptable to include a short cut. There is enough busyness in the kitchen at Christmas that sometimes it's more important to have these ready with as little stress as possible, and focus that extra time on spending it with loved ones.


This recipe is easily adapted to suit different tastes - include whichever dried fruit and nuts you fancy. Flaked almonds, pistachios or a few chopped glacé cherries would look particularly attractive in my opinion.

Mince Pie Slices with Lemon Icing

Adapted from Good Food

This twist on a Christmas favourite combines an extra fruity mincemeat filling with flaky puff pastry, drizzled with a zesty icing

Mince Pie Slices with Lemon Icing
Cuts into 12 slices

Ingredients

  • 400g jar mincemeat
  • 1/2 apple, cored, peeled and finely chopped
  • Zest of 1 lemon, plus 2 tsp juice
  • 40g dried cranberries
  • 25g chopped nuts
  • 1 heaped tbsp ground almonds
  • 375g pack ready-rolled puff pastry
  • 50g icing sugar

Method

  1. Preheat the oven to 220C/200C Fan/Gas Mark 7. 
  2. Combine the mincemeat, chopped apple, lemon zest, cranberries and nuts in a bowl.
  3. Roll out the pastry and trim the end to make a 23cm square. Lay on a baking tray.
  4. Scatter the ground almonds evenly over the pastry. Spread the mincemeat mixture over the whole of the pastry, right to the edges. 
  5. Use the spare pastry to decorate the top of the slices. I cut strips and lay them over the mincemeat in a lattice pattern, making sure they are secure to the pastry base. Or cut shapes from the pastry (stars, hearts) and lay them equal distances apart. 
  6. Bake in the oven for 15 minutes, until the pastry is risen and golden. Leave to cool.
  7. Once cool, mix the icing sugar with the lemon juice. A little water may be needed to reach the right consistency. Drizzle the lemon icing over the mince pie and cut into 12 slices. 

Monday, 8 October 2012

Sweet and Sour Chicken

It's one of those times where I wish I didn't need to sleep so much; I have so much to do and the days just aren't feeling long enough. As it gets colder I feel even more like burying myself in oversized jumpers and getting comfy in front of the tv with a big mug of tea - however my degree is kinda of getting in the way of those plans. It's final year though and amazingly I have been really enjoying uni so far, so I have no choice but to just get on with it. 

Of course this means making sure I'm full of delicious hot food full of healthy veg (especially because of all the bugs going around recently!). Which brings me onto the recipe below. 

I always want to try and learn how to make my favourite dishes. This has meant delving into numerous cookbooks in search of a sweet and sour recipe that I can shut my eyes and just for a moment maybe think I got this from a takeaway or restaurant. 

I think I'm there with this.


Obviously it had to be easy (and student budget friendly!) to put together. This uses mainly storecupboard ingredients with just a couple of fresh vegetables and chicken thrown in, so whenever I fancy this it's not long before I'm sat down in front of a fluffy pile of rice topped with steaming hot sauce.


Cheap, easy and healthy! And most importantly, warm and filling enough to get me through the ever-accumulating book chapters and journal articles that keep piling up!


Feel free to swap the chicken for pork, or extra vegetables can be easily added for a veggie version. This also goes well mixed in with some cooked noodles and served with chinese nibbles on the side.

Sweet & Sour Chicken


Sweet and Sour Chicken
This sweet, mildly spicy sauce is quick and easy to make and full of delicious flavours, and goes perfectly with either chicken or pork. 

Serves 2

Ingredients

  • Oil
  • 2 cloves garlic, crushed
  • Small piece of ginger, chopped finely
  • 1 tsp chilli sauce
  • 1 onion, sliced
  • 1-2 chicken breasts, cut into equal sized pieces
  • 1 red or yellow pepper, chopped
  • 1 432g tin of pineapple rings in juice, rings chopped into eighths and juice reserved
  • 2-3 tbsp soy sauce
  • 1 heaped tsp tomato puree
  • 1/2 tsp Chinese 5 spice powder
  • 1 level tsp cornflour (optional)
  • Boiled rice or egg fried rice, to serve

Method

  1. Heat oil in a wok. Add garlic, ginger, chilli sauce and onion and cook for 2-3 minutes until softened. 
  2. Add the chicken and a couple of tablespoons of the reserved pineapple juice to the wok, and cook through. 
  3. Add the pepper and pineapple pieces and continue cooking for a further 2 minutes or so.
  4. While the pepper and pineapple is cooking, make the sauce. Add the soy sauce, tomato puree, 5 spice and the rest of the pineapple juice to a bowl. Stir until evenly mixed. 
  5. Add the sauce to the wok and let it bubble for a few minutes until thickened. If necessary, add a teaspoon of cornflour and heat through until the sauce is thickened to your liking. 
  6. Serve over plain or egg fried rice.

Saturday, 29 September 2012

Seasoned Oven Chips

It's been such a hectic week, first week back at uni and I already have numerous books/articles to read, coursework to start, and I'm still in the process of figuring out my dissertation project! Busy but I've been loving it: I feel a lot more settled this year, placement has really given me the time off I needed to return with a better perspective on things. Saying that though, give it a couple more weeks and I'll probably have regressed back to my former stress head self! 

Also thought I'd mention the blog's new header, courtesy of my brother, Nick (@nicknak49 on Twitter). He's currently studying Interactive Media so spends his time creating graphics and animations, and he offered to mess around with something for here in his spare time before he's gotta head back off to uni. It's amazing to see how good he's getting with this kind of stuff, the animation stuff he did last year was brilliant. Proud big sis right here :) Every now and then he posts some of the stuff he's working on over on his blog, which I recommend checking out. 

Anyway, I'll finish off with a quick recipe that I whipped up the other night. Comfort food season is definitely starting for me!

Seasoned Oven Chips


These chips are really quick and easy to make, the only time you might get impatient is waiting for them to cook!

Place an oil-drizzled baking tray into a pre-heated oven (200-220C/400-425F/gas mark 6-7) for about 5 minutes.

While the oil is warming up, chop your potatoes (Maris Piper are great) into chips as thin or as chunky as you fancy (peel as well if you like, though I always prefer to leave the skins on), until you have as many as you need - depending on the size of your potatoes, this is usually around 2 per person. 

Take the tray out of the oven and lay the potatoes evenly on it (be careful, the hot oil will spit!).

Add whatever seasoning you fancy. For these I added generous amounts of garlic salt and paprika. Use a spoon to carefully toss the chips so they are evenly coated in oil and seasoning.

Cook in the oven for about 40 minutes to an hour, depending on the quantity and thickness of chips, rotating the tray a couple of times.


I served the chips with home-made herby garlic mayo (a few tablespoons of mayonnaise, 1 crushed garlic clove and a sprinkle of herbs to taste), and chicken, bacon and cranberry mini baguettes. These were topped with the last of the brie we got hold of at the Plymouth Seafood Festival and popped under the grill for a few minutes. Seriously yummy, trust me.

Monday, 13 August 2012

Cherry Traybake

Sea breeze carrying smells from the restaurants nearby; the racket of seagulls and children all day; sunlight pouring over the wooden floors. This is my new flat and I love it. It's bigger and brighter than my previous living spaces, which makes up for the fact that it's also the noisiest place I've lived (but in a comforting, bustling kind of way).

After 3 years of tiny, dark kitchens, this one feels enormous by comparison (and has windows!) and I'm still learning my way around it. I couldn't wait long to pull out my baking stuff and christen the kitchen with sugar and butter, in the form of a sponge cake studded with cherry pieces and drizzled in icing.


The cake cuts into thin slices, with just a smidge of icing to ensure that sweet tooth is satisfied, but is light enough for almost guilt-free second helpings (or so I'm telling myself).


Cherry Traybake 

Adapted from a Mary Berry recipe.

A light cake dotted with cherry pieces, perfect for a summer afternoon tea. 

cherry cake

Cuts into 12 - 16 

Ingredients

  • 100g glacĂ© cherries
  • 125g self raising flour
  • 25g ground almonds
  • 1 level tsp baking powder
  • 100g butter
  • 100g caster sugar
  • 2 large eggs
  • 100g icing sugar

Method

  1. Preheat oven to 160C/Fan 140C/Gas Mark 3. Grease and line a deep 20cm x 30cm baking tray.
  2. Put 25g of the cherries aside. Chop the remaining 75g glacé cherries into quarters. Rinse under cold water to remove syrup and dry on kitchen paper.
  3. Sift flour, almonds and baking powder into a large bowl. Add in the butter, caster sugar and eggs and beat with an electric whisk until combined.
  4. Gently fold in the chopped and rinsed cherries. 
  5. Pour the mixture into the baking tray and smooth over the top using the back of a spoon. Bake for 40-50 minutes (keeping an eye on it after half an hour) in the centre of the oven, until a skewer comes out clean and the top is golden brown.
  6. Leave the cake to cool in the tin for ten minutes, then turn out and leave to cool completely.
  7. For the topping, sift the icing sugar into a bowl. Add cold water, a spoon at a time, until a pourable consistency is reached. Drizzle over the cake. 
  8. Chop the remaining glacĂ© cherries into small pieces and scatter over the cake. Leave to set, then cut into pieces and serve. 

Tuesday, 3 July 2012

Baked Eggs and Tomatoes

So this is now officially my summer holiday, and I have time off since finishing placement last Friday. Well, if flat hunting subsequently followed by moving, writing my placement report and starting my dissertation work, as well as trying to get as much overtime at work as possible can be considered time off. But let's be honest, I'd be bored otherwise.


I thought I'd share a recipe I discovered a while back now and have made many times since - it's so easy as it's all made in one pan, can be as filling or as light as you like depending on what you have with it, and it's versatile as to what herbs/spices you fancy throwing in there. And it's vegetarian, so great for sharing amongst a group. 

The main ingredients are eggs, peppers, onions and a tin of tomatoes - I tend to have these in anyway as usually they're the base of almost everything I eat (also on my summer to-do list: try out new foodie things!). Add in a sprinkle of oregano, some paprika, chilli powder, parmesan - whatever you have to hand or are in the mood for. To satisfy meat cravings, fry some bacon pieces or a couple of sausages (skins removed and meat chopped) along with the onions. Chorizo would also be brilliant in this. 

If you're hungry, serve on top of a plate of pasta with garlic bread on the side. To enjoy it for lunch or as a lighter meal, make some couscous and salad to go with it. This would also make a good brunch with some warm, crusty bread. 


Baked Eggs and Tomatoes

Slightly spicy tomatoes are topped with eggs and cheese and baked in the oven - great for serving at any time of the day.
baked eggs & tomatoes

Serves 2

Ingredients

  • 1 onion, sliced
  • 1-2 cloves of garlic, crushed
  • 1 red or yellow pepper, sliced into thin strips
  • 1 400g tin chopped tomatoes
  • 1 tsp oregano
  • 1 tsp paprika
  • 1/2 tsp cayenne pepper powder (to taste)
  • 4 large eggs
  • Parmesan (Optional)
  • 1-2 spring onions, chopped (Optional)
  • Couscous or pasta, to serve
  • Bread, to serve

Method

  1. Preheat the oven to 220C/200C Fan oven.
  2. Heat oil in a large frying pan. Add the onions, garlic and peppers and fry until softened. 
  3. Tip in the tin of of tomatoes and add the oregano, paprika and cayenne (or herbs/spices of your choice to taste).
  4. Bring to the boil then turn the heat down and leave to simmer for about 15 minutes, or until the tomatoes have cooked down and are less watery. 
  5. Crack the eggs into the pan, evenly spacing them out. Sprinkle parmesan over each egg, and extra cayenne pepper if desired. 
  6. Place the pan into the oven on the top shelf (watching out for the handle when you take it out again!)
  7. Bake for around 10 minutes or so, until the eggs are cooked to your liking (I tend to do mine quite well done). A couple of minutes before the eggs are done, sprinkle the spring onion over the whole of the pan.

Sunday, 10 June 2012

Mocha Cupcakes

I am terrible at making decisions. I'm in my penultimate year of university so it's not really the best time to have this as a trait. Having to attempt to trawl through an avalanche of postgrad courses, graduate schemes and job options over the next year is not going to be easy - and that's after I figure out which area I want to work in in the first place.

On the one hand having a psychology degree means I'll be fairly flexible with the kind of work I can do. On the other this just means they'll be even more choices I'll have to decide from. Which isn't something I'm complaining about - better that than to be limited at this stage - but when you're the type of person who gets caught up with excitement for one idea before swiftly moving onto the next it'd be nice if there was a more obvious path to follow.

I'm no better when it comes to the little things in life, such as recently trying to decide on which cupcakes to bake. I didn't want anything with too much chocolate, too much fruit, any kind of flavour that would overpower the cakes. I finally opted for a light, moist chocolate cupcake to satisfy my cocoa cravings, topped with a smooth coffee butter cream for a different dimension of flavour. Thankfully in this instance I could put everything I fancy into one thing and enjoy the best of both worlds.


While my final year of uni won't be quite such an easy task (and is possibly slightly more important), for now I can sit back knowing I've successfully made one decision and the outcome hasn't been a catastrophe.

And at the very least, I now have cake to help me with all this terribly exhausting thinking.

Mocha Cupcakes

Moist chocolate cupcakes finished with a glossy coffee buttercream and milk chocolate sprinkles smile

Makes 12

For the Cakes:

Ingredients

  • 125g butter or margarine
  • 125g caster sugar
  • 2 large eggs
  • 1 tbsp golden syrup
  • 150g self raising flour
  • 2 tbsp good quality cocoa powder (I used Green & Blacks)
  • 1 tsp baking powder
  • 2 tbsp milk

Method

  1. Preheat the oven to 180C (160C Fan oven)/350F/Gas Mark 4. Line a muffin tray with 12 cases.
  2. Cream the butter and sugar together using a wooden spoon.
  3. Crack the eggs into the bowl one at a time, beating well after each addition. Beat in the syrup.
  4. Sift together the flour, cocoa powder and baking powder and gently fold into the butter mix a third at a time. Add the milk and continue to fold until everything is combined.
  5. Divide the mixture between the cupcake cases and bake for around 20 minutes until the cakes are risen and springy to the touch. Leave to cool on a wire rack.

For the Buttercream Icing:

Ingredients

  • 55g butter or margarine
  • 110g icing sugar, sifted
  • 1 tbsp instant coffee dissolved in 1 tbsp of boiling water

Method

  1. Cream the butter and sugar together. Add the coffee mixture.
  2. Spread the butter cream onto the top of each cooled cake.
  3. Add chocolate sprinkles or any other decorations you fancy.

Wednesday, 30 May 2012

Lime and Coriander Fish Stir Fry

It feels like it's been a long winter in England, but finally the sun is out and so are my summer clothes! With the prospect of actually getting to wear bikinis and summer dresses this year also comes the realisation that I probably need to start getting back into shape. Thankfully I naturally want lighter meals full of vegetables and fresh flavours so eating healthier isn't too difficult. Well... apart from all the ice cream (hey, you've gotta make the most of this weather!) but hopefully this meal can do a bit to balance it out at the very least.

Lime and Coriander Fish Stir Fry 

This stir fry bursting with citrus flavours is light and healthy, perfect for a quick summer dinner.


Serves 2


2 pieces of white fish (I used frozen)
1 bunch (80g) udon noodles
A couple of handfuls of frozen broccoli florets
2-3 cloves of garlic, crushed
3cm ginger, chopped
1 onion, sliced
1 red pepper, chopped
1/2 tbsp fish sauce
1 tbsp mirin
3 tbsp soy sauce
1/2 lime
Bunch of coriander
1 tbsp oil

-Cook the fish according to pack instructions.
-Cook the noodles and broccoli according to pack instructions. Drain and rinse under cold water. Set aside.
-Heat the oil in a wok.
-Add the garlic, ginger and onion and stir fry for a few minutes, until beginning to soften.
-Add the pepper and cook for a further two minutes.
-Add the fish sauce, mirin and soy sauce along with a splash of water. When the mixture is bubbling, add in the cooked noodles and broccoli.
-Squeeze most of the lime over the noodles. Tear some coriander and add it to the wok. Toss together until the sauce evenly coats everything.
-Divide the stir fry between two plates. Add a piece of fish to each plate and serve with an extra squeeze of lime and and a sprig of coriander.

Thursday, 26 April 2012

Chicken Fajita Pasties

Last weekend consisted of lots of baking - pizza, cookies, and these spicy pasties. I love Mexican food, so decided to give a fajita filling to a pasty recipe I'd used before. A sprinkle of turmeric and paprika are added to a shortcrust pastry to give it some colour and a flavour complimentary to a salsa-drizzled chicken, onion and pepper filling. These are filling enough (and moreish enough!) to be dinner on their own, or would be nice as a different sort of side dish as part of a Mexican night.


Chicken Fajita Pasties


Makes roughly 25

For the pastry: (Adapted from The Great British Bake Off book)
225g plain flour
Pinch of salt
1/2 teaspoon turmeric
1/4 teaspoon paprika
125g chilled butter, diced
About 4 tablespoons icy water

For the filling: 
1 chicken breast, cut into 1.5cm cubes
1 small onion, chopped finely
1/2 red pepper,  chopped finely
1 clove of garlic, crushed
1 teaspoon cumin
1 teaspoon paprika
1 teaspoon ground coriander
1/2 teaspoon cayenne pepper
A sprinkle of chilli powder, to taste
1 tablespoon barbecue sauce

Salsa
Egg, beaten to glaze
Oil, for the pan
Sour cream, to serve

-To make the pastry, sift the flour, salt, turmeric and paprika into a large bowl.
-Using our fingertips, rub the diced butter into the flour a bit at a time until the mixture resembles breadcrumbs.
-Stir in enough of the cold water to bring the mix together into a soft, but not sticky dough. Wrap in clingfilm and keep in the fridge until needed. 
-To make the filling, heat the oil in a large pan or wok. Add the garlic and onions and fry until soft.
-Add the peppers and chicken and fry for a minute. 
-Add the barbecue sauce and the spices and mix until everything is fully coated. Continue to fry until the chicken is cooked through. Put aside.
-Now to put the pasties together! Preheat the oven to 180C/350F/Gas mark 4. 
-Roll out the pastry onto a lightly floured worktop to a few millimetres thick. These are only small pasties so you don't want to just have a mouthful of pastry, but the pastry needs to be thick enough to contain the filling comfortably. 
-Using an 8cm cutter, cut rounds from the pastry. Keep re-rolling the remaining dough until it is all used up.
-Place a small splodge of salsa in the centre of the round. Add a teaspoon of the chicken mix, leaving a border around the filling. 
-Brush a little of the beaten egg around this border, then fold the pastry over the top of the filling, making a semi-circle. 
-Press the edges firmly together. If you like use a fork to gently do this and create a pattern.
-Make holes in the top with a fork to allow steam to escape while cooking. Glaze with the beaten egg. Line on a baking tray lined with baking parchment.
-Bake in the oven for about 25 minutes, until the pastry is a golden colour and crisp. Serve with sour cream and extra salsa.
-------------------------------------------------

Thursday, 19 April 2012

Cheat's Hoisin Chicken Stir Fry

Just a quick post to share the recipe for the yummy stir fry I made this evening. When I started uni I assumed I'd be eating pasta constantly but I've actually ended up making stir fries more often, probably because they're so easy to vary and most vegetables and meat work really nicely. They're also so quick to make whilst still being healthy so there's no excuse for slacking on cooking during the week.

I love Hoisin sauce and ended up experimenting one day when we didn't have any in the cupboard - flavour-wise it seems like a Chinese barbecue sauce to me, so I added some five spice and a splash of soy sauce to some ordinary barbecue sauce and ended up with a similar flavour. Not quite as good as the real thing, but a good make-do when you don't have any in (and cheaper too!)

All the amounts are approximate, I don't bother too much with exact quantities with things like this, so adapt according to taste! This serves two people.
Add oil to a wok, along with 2-3 crushed cloves of garlic, some chopped ginger, and a sliced onion. Add some chilli if you like (I use Very Lazy Chillies out of a jar).
Chop chicken into small equal pieces (pork goes well with the sauce too) and add to the wok. After a couple of minutes add any vegetables you fancy.
Meanwhile, cook noodles according to pack instructions, and make the sauce: In a bowl, add 1 tablespoon of honey, 2-3 tablespoons of barbecue sauce, 2-3 tablespoons of soy sauce, and half a teaspoon of Chinese 5 spice powder (feel free to add more, I'm not a huge fan of the aniseed taste it has so I don't use that much). The sauce is quite thick so add a splash of water to achieve the consistency you want.
When the chicken is almost cooked through, add the sauce to the wok and let it bubble for a few minutes. Add the noodles to the pan and toss together so the sauce evenly coats everything. Check the chicken is cooked through, and serve!

Sunday, 15 April 2012

Lamb Meatballs with Greek Salad

I am well and truly ready for Summer now. I must admit, the thought of warm evenings with barbecues, summer dresses and maybe even getting some colour on my pale skin are preoccupying me more than work is. Going on holiday last month has also made me even more desperate to escape somewhere lovely after putting me in a travelling mindset.
Probably not gonna happen anytime soon though. However, while I can't be lounging on a beach in the Mediterranean, I can eat like I'm there.
I never used to be much of a fan of meat, tending to eat only chicken. Then I tried lamb, cooked perfectly, and have since embraced my inner carnivore. I don't like to do too much with it when I cook it, as I think it has a lovely flavour naturally.
Here I've made some meatballs out of lamb mince, adding just a bit of onion, garlic, tomato purĂ©e and seasoning. I served it with a fresh Greek salad drizzled with olive oil, some spicy chickpeas and pitta bread. A dollop of minted Greek yoghurt completed my mini Mediterranean feast.


The recipes below all serve two people. Everything can be easily multiplied however, and would make excellent side dishes at a barbecue or the like. Experiment with quantities of individual ingredients and seasonings to suit your own tastes. 
----------------------------------------------------------------------------------------
For the meatballs:
250g lamb mince
1/2 red onion
1 heaped teaspoon tomato purĂ©e
1 clove of garlic, crushed
A sprinkle each of cumin and ground coriander, to taste
Salt
Pepper

Pitta bread and iceberg lettuce, to serve.

-Preheat an oven to 180C. Line a baking tray with kitchen foil.
-Place the mince into a bowl.
-Grate the onion, or use a food processor if available to finely chop the onion. Add to the mince, along with the tomato purĂ©e, crushed garlic, spices and salt and pepper to taste. Mix well.
-Roll the mince into meatballs of equal size and place on the tray. (I have made quite small meatballs - if you make larger ones just cook for longer).
-Cook in the oven for about 10 minutes, until just cooked through and still juicy.
-Warm the pitta bread through in the oven for a few minutes.
-Chop and rinse the lettuce.
-Serve with yoghurt, salad and chickpeas.
-------------------------------------------------------------
For the minted yoghurt:
4 generous tablespoons Greek yoghurt
A few sprigs of mint
1 garlic clove

-Place the yoghurt in a bowl.
-Crush the garlic into the yoghurt.
-Shred the leaves of the mint and stir into the yoghurt.


-------------------------------------------------------------

For the Greek Salad: (Adapted from GoodFood 101 Mediterranean Dishes)


1/2 red onion, sliced
4-5 Vine ripened tomatoes, quartered
1/3 cucumber, sliced and then quartered
Olives and Feta cheese (I bought a mixed selection from Tesco deli but use whatever you fancy)
1 teaspoon Oregano
Olive oil

-Prepare the onion, tomatoes and cucumber and place into a serving dish.
-Sprinkle over the oregano.
-Drizzle over a tablespoon or two of olive oil. The olives I purchased already had some dressing on so vary the amount you add depending on this. 
-Stir to combine. 


-------------------------------------------------------------

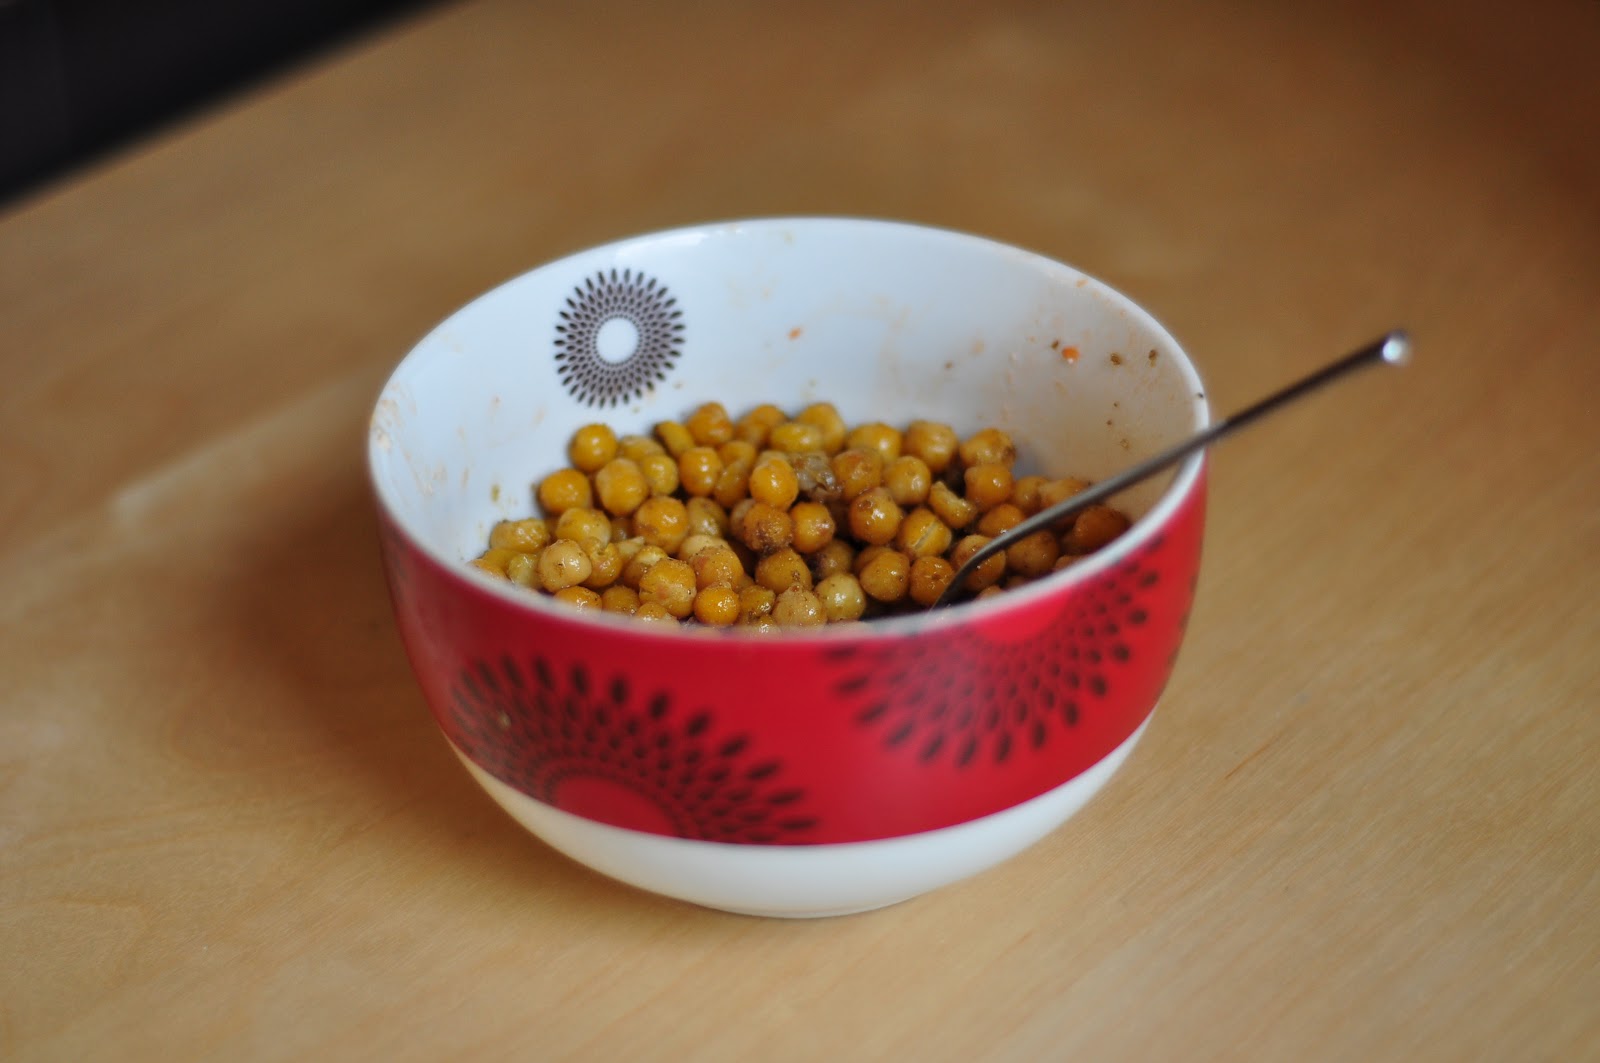
For the chickpeas: (Adapted from a recipe tweeted by @TheBoyThatBakes)
1 tin of chickpeas
2 tablespoons of olive oil
1/2 tablespoon cumin
1/2 tablespoon ground coriander
1 teaspoon garlic salt
A pinch of pepper
A bit of chilli powder, to taste

-Preheat the oven to 180C. 
-Mix all the ingredients together and spread out onto a baking tray.
-Bake for 30-45 minutes.

These are quite dry by themselves but add a different texture to the meal when mixed with the yoghurt and salad.


-------------------------------------------------------------


Hopefully this should satisfy my holiday cravings for a little while at least... 


Wednesday, 4 April 2012

Easter Nest Cakes

As it's not long at all now until Easter (where the hell is this year going?!) I decided to make some Easter-themed cakes - i.e. smother some sponge with a horrendous amount of chocolate.


The sponge cake for this recipe is the same as for my Victoria Sponge cake, again made in a rectangular baking tray. This means the cakes aren't too rich and over-chocolately, and the chocolate buttercream is flavoured with orange to give it a lighter taste reminiscent of Spring/Summer. This is then covered in chocolate sprinkles and whatever little Easter goodies you like to give the 'nest' effect.

---------------------------------------------------------------
Ingredients

For the sponge:
110g butter/margarine
110g caster sugar
2 large eggs
110g self-raising flour
1 teaspoon baking powder
1 teaspoon vanilla extract

For the buttercream:
100g icing sugar
50g butter/margarine
1 teaspoon orange extract
2 teaspoons good quality cocoa powder (I used Green & Blacks)

To decorate:
Chocolate sprinkles
Chocolate eggs

-Preheat the oven to 180C(160C fan oven)/350F/Gas Mark 4.

-Grease and line a deep rectangular 20cm x 30cm baking tray.


-Cream the butter and caster sugar together with a wooden spoon until light and fluffy.


-Beat in the eggs, one at a time.


-Sift the flour and baking powder into a separate bowl, then gently fold a third of this at a time into the mixture using a metal spoon, until you have a smooth batter.


-Fold in the vanilla extract.
-Pour the mixture into the baking tin, gently smoothing the top with the back of a spoon.


-Bake for about 25-30 minutes until a skewer inserted into the centre comes out clean, and the cake is a light golden brown colour.


-Leave to cool.
-Using an 8 cm round cutter, cut about 6 rounds from the cake (there will be cake left over for nibbling!)


-Make the chocolate buttercream. Cream together the butter and sugar, then add the cocoa powder and orange extract and continue to stir until smooth.


-Cover each cake with buttercream. I'm not the best at this at all so it ended up looking very messy; this actually works for this recipe though, as it gives the 'nest' effect straight away.


-Now time to get decorating! Use a mixture of dark and milk chocolate sprinkles on the top and sides of the cakes, leaving a small space in the centre to place the chocolate eggs.


-Add any other decorations that you fancy.


Sunday, 1 April 2012

Victoria Sponge Cake

OK, so this isn't the traditional looking Victoria Sponge exactly, but if you're in need of some light as air cake, perfectly sweetened buttercream and lots and lots of jam this has everything covered.

A little while back I was in a position where I had no idea what to do with myself, and the only thing that could distract me and make me feel better was an afternoon spent baking. For certain reasons the only thing I wanted to make was a Victoria Sponge. However, I don't have two small cake tins, just one large round tin, and I am terrible at cutting cakes into two equal slices. And I had to make this cake the best I could. So instead I used the cake tin I normally use for brownies, flapjacks and the like. 

Cutting the tray of cake in half I got two pieces of cake that were almost equal in size and thickness, that I smothered in layers of buttercream and raspberry jam, and dusted with icing sugar. I'm not saying this is the prettiest cake in the world, but it looked good to me, especially in comparison to my past cake disasters! 
A slab of this (this was definitely a comfort eating moment so don't judge!) with a cup of tea, and while nothing might have changed I could deal with it all a little bit better. 
--------------------------------------------------------------
The recipe for the sponge is adapted from the Vanilla Cupcakes from Eat Me! - the mix can be split between muffin cases to make 12 cupcakes

Ingredients

For the sponge:
110g butter/margarine
110g caster sugar
2 large eggs
110g self-raising flour
1 teaspoon baking powder
1 teaspoon vanilla extract

For the buttercream:
100g icing sugar
50g butter/margarine
1 teaspoon vanilla extract

Jam
Icing sugar, to dust

-Preheat the oven to 180C(160C fan oven)/350F/Gas Mark 4.
-Grease and line a deep rectangular 20cm x 30cm baking tray.
-Cream the butter and caster sugar together with a wooden spoon until light and fluffy.
-Beat in the eggs, one at a time.
-Sift the flour and baking powder into a separate bowl, then gently fold a third of this at a time into the mixture using a metal spoon, until you have a smooth batter.
-Fold in the vanilla extract.
-Pour the mixture into the baking tin, gently smoothing the top with the back of a spoon.
-Bake for about 25-30 minutes until a skewer inserted into the centre comes out clean, and the cake is a light golden brown colour.
-Leave to cool.
-Once cool, remove any greaseproof paper and cut the cake in half, giving you two roughly 10cm x 15cm pieces. 
-Place one half on a serving plate and spread with jam. The amount is entirely up to you, but in my opinion the more generous the better (especially with the raspberry jam I used - it's delicious!)
-To make the buttercream, cream together the butter and icing sugar until smooth, then add the vanilla extract. Taste to make sure it's the right sweetness.
-Turn the remaining cake half upside down and spread with the buttercream. Place on top of the jam covered half.
-Sift icing sugar all over the cake to finish. 


Related Posts Plugin for WordPress, Blogger...